

The Right Order for a Whole-House Energy Upgrade
Author: P.A.S Design Build Team
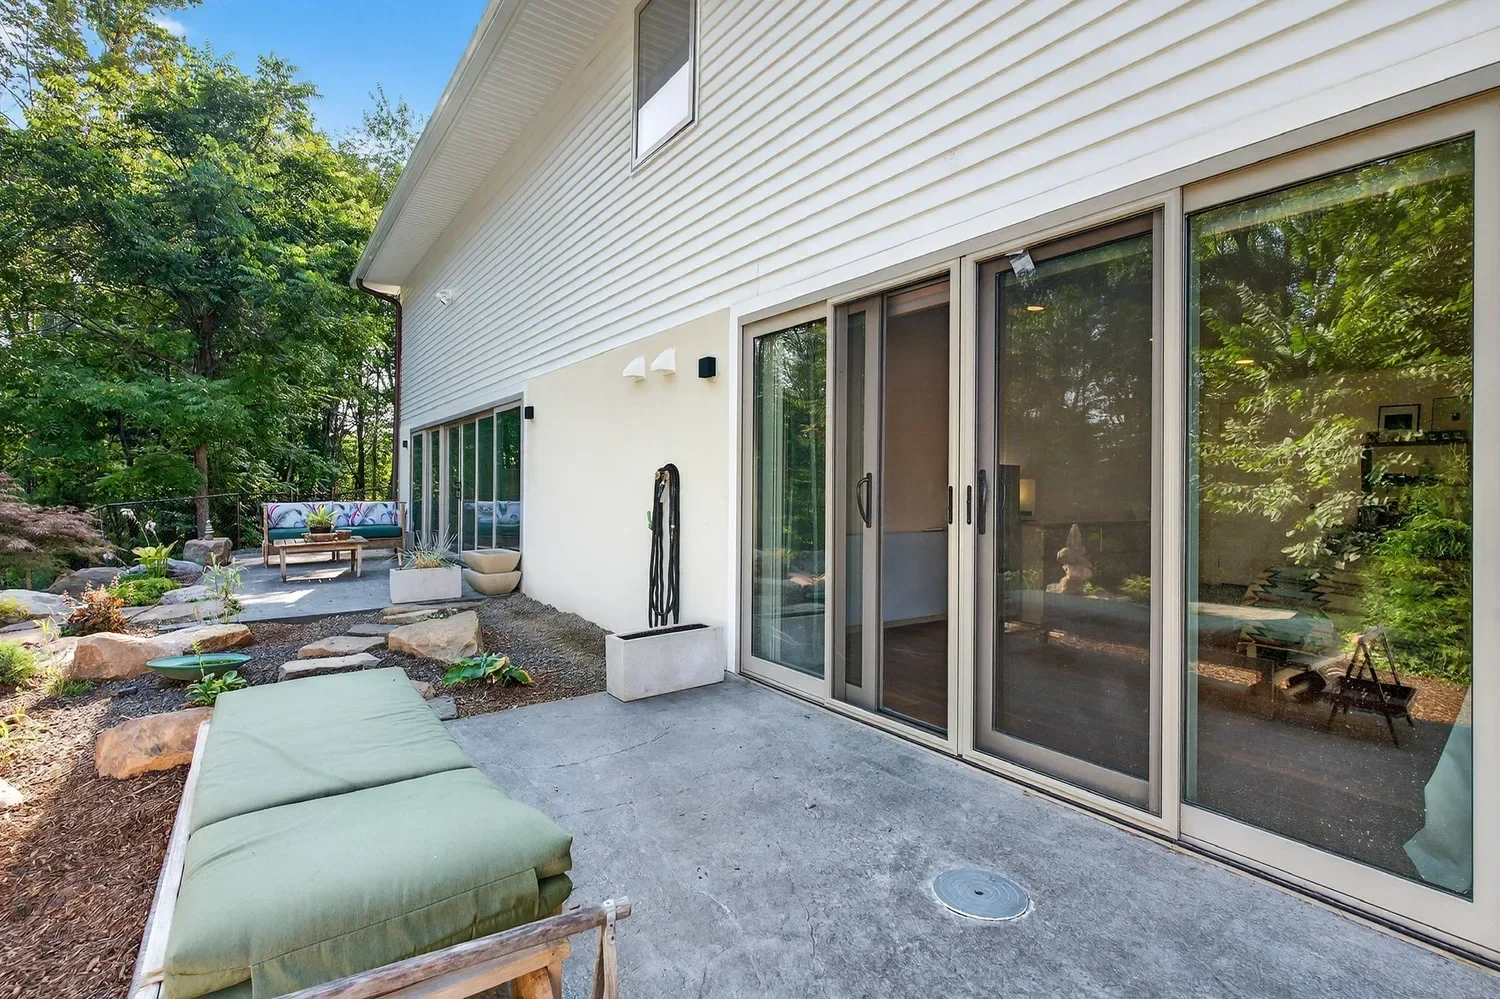
Minnewaska, Kerhonkson. From the P.A.S Minnewaska case study.
On almost any older house we'd start by getting it tested, then seal the air leaks, insulate and deal with whatever water problems turn up, replace only the windows that have actually failed, add fresh-air ventilation, size the heat pump to the improved house, and leave solar for last, and the reason for that order is that each step you finish makes the one after it smaller and cheaper.
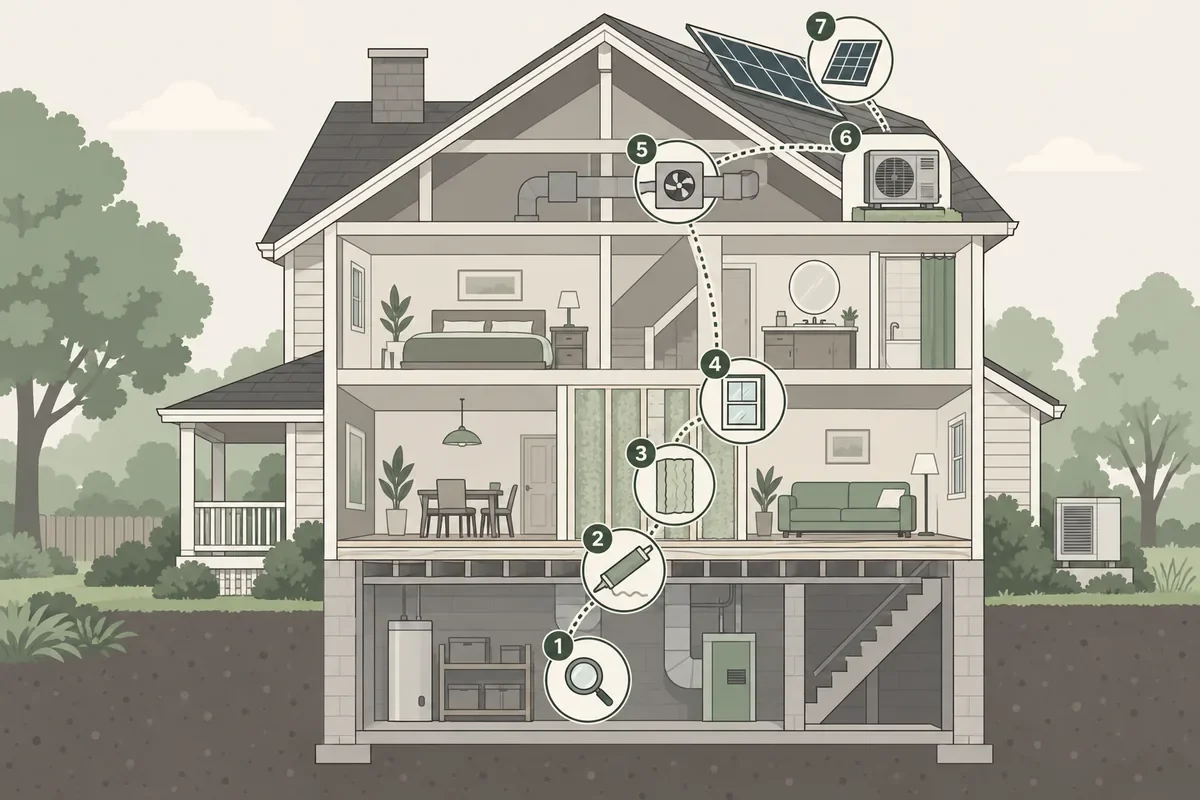
Illustration: the seven-step upgrade order.
Key Takeaways
Get a blower-door test done before anything else, since it turns a vague "it's drafty" into a number you can work from.
If a heat pump is in your future, seal and insulate first so the equipment gets sized for the house you'll have, not the one you've got now.
Hang on to windows that still work; in most old houses the attic floor is leaking more air than the glass ever did.
After the house is tight, it needs fresh-air ventilation with heat or energy recovery built in.
Solar goes on at the very end, sized to whatever the finished house really ends up using.
Why the heat pump goes near the end
It usually starts in January. The oil boiler that's been limping along for twenty years finally quits, the house is getting cold, and somebody needs to put heat in it this week. That's a completely reasonable moment to panic-buy a heat pump, and it's how a lot of older Hudson Valley houses end up with the wrong one.
A heat pump is sized to how much heat the house loses on the coldest nights of the year. Ulster County sits in Climate Zone 6, and a drafty farmhouse here loses a lot, so the installer sizes big. Then next year you seal the attic and insulate the walls, the heat loss drops, and you're left with equipment built for a house that no longer exists. An oversized heat pump tends to run in short on-and-off bursts, which wastes energy and does a poor job of pulling humidity out of the air in summer.
When we replace a boiler on one of our renovation projects, we size the new system around the envelope the house is going to have, not the one it has today. NYSERDA makes the same case in its own guidance: seal and insulate first, and you can heat and cool the house with smaller, less expensive equipment. (If your boiler just died and you can't wait, jump to the FAQ at the bottom. There's a workable answer.)
Step 1: Test the house before anyone sells you anything
The first thing we'd want on an old house is a blower-door test, where a technician sets a big calibrated fan into an exterior doorway, pulls air out of the house, and measures how fast the outside air leaks back in through all the cracks you didn't know you had. What comes out of it is a number called ACH50, and before you spend real money on an old house there isn't much that's more useful to know.
New York's 2025 energy code wants new homes in Ulster County testing at 2.5 ACH50 or tighter, and while most older houses start out well above that and a renovation isn't held to the new-home number anyway, it's still a handy yardstick for seeing how far you've got to go. So test before the work. Then test after. Now you know what your money bought.
A good assessment goes past air leakage too, looking at the structure, at how much insulation is really in the walls and attic once somebody checks, at the condition of the windows and any signs of water, and at how much heating and cooling the house actually needs. In New York, many of these assessments happen through NYSERDA's programs, which are covered under paying for it below.
Step 2: Seal the leaks first
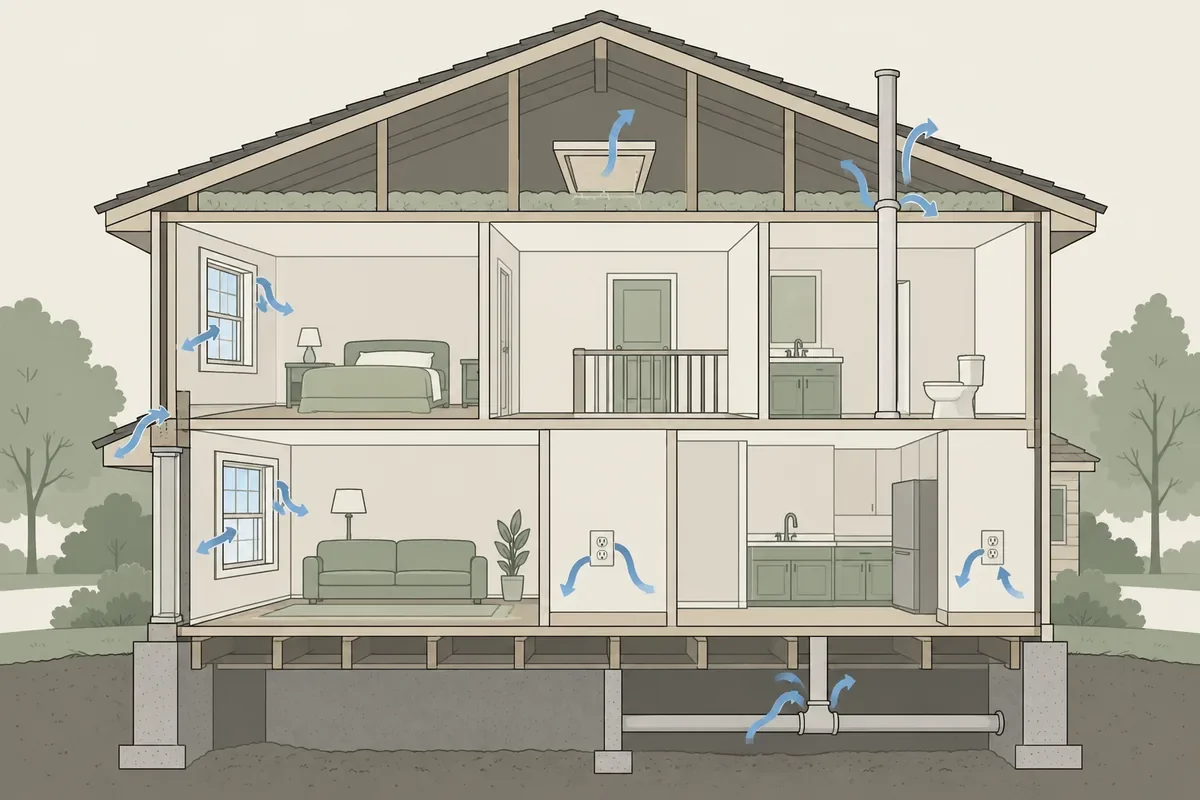
Illustration: common air-leak points in an older house.
If you ask a homeowner where the house is drafty, they'll usually point at the windows, and they're not entirely wrong, but the bigger leaks tend to be up in the attic and down in the basement where nobody spends much time. On the attic floor they're around the chimney, the recessed lights, the plumbing vent stacks and the attic hatch. There are more down at the rim joist, where the floor framing sits on top of the foundation, and all through the house there are holes cut over the decades for wiring, pipes and ducts that nobody ever sealed back up. Then there are the gaps around window and door frames, so the windows do earn some of the blame, just not for the glass.
Got an older balloon-framed house? Add one more. Its wall cavities can run unbroken from basement to attic, and warm air rides straight up them like smoke up a chimney.
We'd start at the attic floor. On a cold night, rising warm air shoves hardest against the top of the house, which makes leaks up there the costly ones. Sealing is cheap next to everything after it. It's easiest with walls and ceilings open. If you're redoing a room anyway, seal and insulate its outside walls before the drywall goes back up. The DOE and ENERGY STAR air sealing guide is a good reference for what to seal each spot with.
Step 3: Fix the water, then insulate
A lot of older Hudson Valley housing was built when insulation was an afterthought, and plenty of these houses have a long history of water getting in somewhere: a leaky roof valley, a wet basement, a gutter that's been dumping on the same sill for decades. Find that history before you choose materials. Insulation packed into a wall that still gets wet holds the moisture against the framing, and that's how a well-meant upgrade turns into rot.
Once the water's handled, the attic is usually the easy win. For an uninsulated attic in our climate, ENERGY STAR recommends R60. Already have some? Then add R49 on top. Pop the hatch and measure before anyone quotes you, so you know whether you're topping up or starting from scratch.
Walls are where houses start to differ, and two of our projects show how much. At South Gully in Ellenville, the house had deteriorated badly enough that we're rebuilding the envelope from the framing out, with airtight polyiso across the walls and roof and a continuous weather-resistive barrier. At Minnewaska in Kerhonkson, the existing walls were in good enough shape for a standard cavity insulation system with a new weather-resistive barrier. In both cases, what we found in the existing walls set the method.
Step 4: Windows, but only the ones that have actually failed
Everybody wants new windows first. You can see them, they feel like progress, and they're not cheap. Trouble is, the worst heat loss is usually somewhere else.
So when does a window earn replacing? When the seal's gone and the glass fogs. When the frame has rotted. Single glazing in a house you've otherwise tightened counts too, and so does a wall that's coming apart for a rebuild anyway. Otherwise, sealing around the frame plus some careful repair can buy an old window years. In plenty of older Hudson Valley houses, the originals suit the house's character better anyway.
When you do replace, ENERGY STAR's current criteria for the Northern zone call for a U-factor of 0.22 or lower. That's a useful line to price triple-pane units against. Before you order, look your county up on ENERGY STAR's zone map.
Planning a project?
Tell us a little about it and we’ll be in touch.
Step 5: Fresh air, on purpose
A leaky old house gets its fresh air the hard way, through every gap and crack in whatever amount the wind feels like that day, which is why the same house can be drafty in January and stuffy in July. Once you've sealed those gaps up, the house needs a planned way to breathe.
New York's energy code requires mechanical ventilation in new homes, and up here in Zone 6 that means a balanced heat- or energy-recovery system with at least 65 percent sensible recovery efficiency. A renovation isn't necessarily held to that, but we'd still use it as the floor when you're comparing units.
Both of the main options do basically the same job, with one fan pulling stale air out and another bringing fresh air in, and a core between them that hands the heat from the outgoing air over to the incoming air so you're not just throwing it out the wall. An HRV moves heat and nothing else, while an ERV also passes some moisture across, which keeps indoor humidity a bit steadier. Federal guidance generally points HRVs at cold, dry climates and ERVs at humid ones, and since the Hudson Valley manages to be both cold in winter and muggy in summer, either one can be the right call here, depending mostly on the house's humidity and what you want it to perform like.
Step 6: Now size the heat pump, to the house you've built
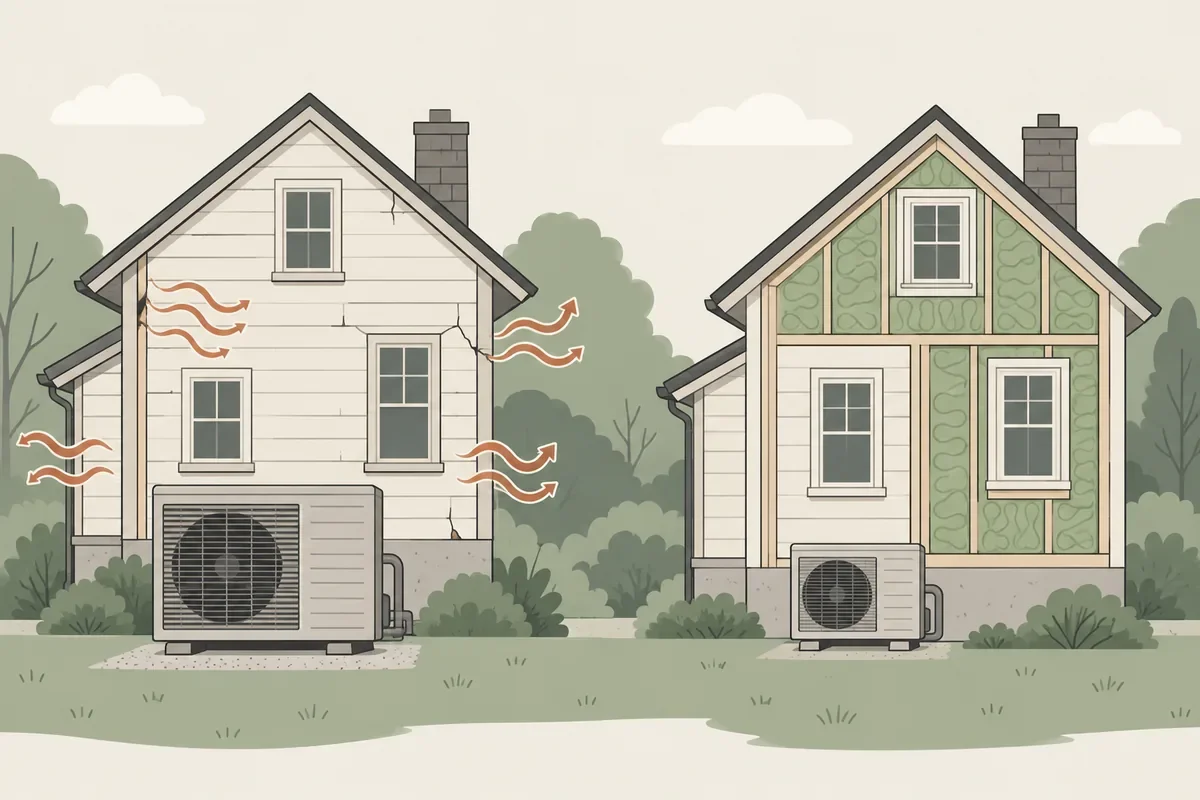
Illustration: a tighter house needs a smaller heat pump.
Now the heat pump. Redo the heat-load calculation after the envelope work instead of reusing the one from the old, drafty house. The new number will be smaller and more accurate, and that's the number to size to.
The house usually tells you which type: a ducted system if there are usable duct runs, ductless heads if the house never had ducts, or an air-to-water unit if you're putting in radiant floors. At Minnewaska, a heat pump handles primary heating and cooling, with supplemental fan coils for extra summer capacity and radiant floor heat throughout.
This is also the moment to look at your electrical service. Compare the existing service, the panel's condition, open breaker space and the calculated load against the new equipment. Sometimes that points to a panel or service upgrade and sometimes the existing service handles it fine; the load calculation is what tells you which.
Step 7: Solar goes last
Solar waits for the same reason the heat pump does. You want the array matched to what the finished house uses, and after sealing and a right-sized heat pump, that number drops. Smaller usage, smaller array. New York's NY-Sun program offers incentives and a network of qualified installers for rooftop and ground-mounted systems.
Not ready for panels yet? Plan for them anyway. Keep a stretch of roof clear and unshaded. While the walls are open, run a conduit path from the attic down to the electrical panel, and save room in that panel for a future solar breaker.
Do you have to do it all at once?
No. Phasing it over a few years is fine, as long as the order holds. At South Gully, the owners asked us to break the project into phases running from spring 2026 to spring 2027, each one built to stop and restart cleanly.
The trouble comes from phasing without a master plan. That's how you end up with a finished kitchen sitting on a panel that still needs upgrading. Or with new walls closed up before anybody decided how to heat the house. Can your budget and schedule handle one stretch? It usually costs less overall (fewer crew trips, walls opened once), and you get comfortable sooner.
Paying for it
Start with the bad news. The federal 25C credit for home efficiency improvements isn't available for property placed in service after December 31, 2025, and the 25D credit for solar and other clean energy systems isn't available for expenditures made after that date. For 25D, the IRS counts the expenditure as made when installation is complete, so a system you paid for in 2025 but finished in 2026 doesn't qualify.
New York help is still on the table. NYSERDA's Comfort Home program opens with a no-fee consultation. After that it pays incentives on air sealing and insulation packages from participating contractors. There's also a windows add-on, for going to ENERGY STAR windows after the sealing and insulating are finished. EmPower+ is aimed at low- and moderate-income households and comes with a no-cost home energy assessment along with funding toward air sealing, insulation, heat pumps, heat pump water heaters, and electrical service and wiring upgrades. These programs change their terms from time to time, so it's worth pulling up NYSERDA's current details in the same month you're planning the work.
Where to start
Our advice: get the whole plan on paper before you buy any single piece of it, even if the work will stretch over several years. A written sequence keeps next year's project from undoing this year's, and it's the only way to know ahead of time what your ventilation and electrical service will need to handle.
P.A.S Design Build does whole-house assessments for older houses around Accord, Kerhonkson and the rest of Ulster County. If you're trying to work out where your own house falls in all this, we're happy to come walk through it with you.
Want to talk through your house? Request a Consultation, or just call (845) 532-3174.
Frequently Asked Questions
-
Not necessarily, and you shouldn't size one to the house as it is today. If air sealing and insulation are coming within the next few years, ask for a heat-load calculation that assumes that work is done, and size to that number. Sizing to today's drafty house locks in the oversizing problem for the life of the equipment.
-
New York's energy code treats a renovation as an alteration. The walls and ceilings you alter need an air barrier, but the code doesn't require the blower-door test for them, and the parts of the house you don't touch don't have to be brought up to current code.
Whether a new ventilation system in a renovation has to meet the Zone 6 heat-recovery rule is a question for your building department, ideally before anything gets designed. We'd still test before and after; it's the only real way to know what the work achieved.
-
Yes, as long as the work met the cutoffs. Per the IRS, you claim either credit on Form 5695 for the tax year the property was installed, not just bought. That means work installed in 2025 goes on your 2025 return, and your tax preparer can sort out the details for your situation.
-
Not through Comfort Home's window add-on, which is tied to upgrading to ENERGY STAR windows after air sealing and insulation. Windows bought ahead of the envelope work don't fit that structure, which is one more reason they belong later in the order.